
Connections
Save a connection to a MongoDB server with its URI, an SSH tunnel, TLS and the authentication the server requires.
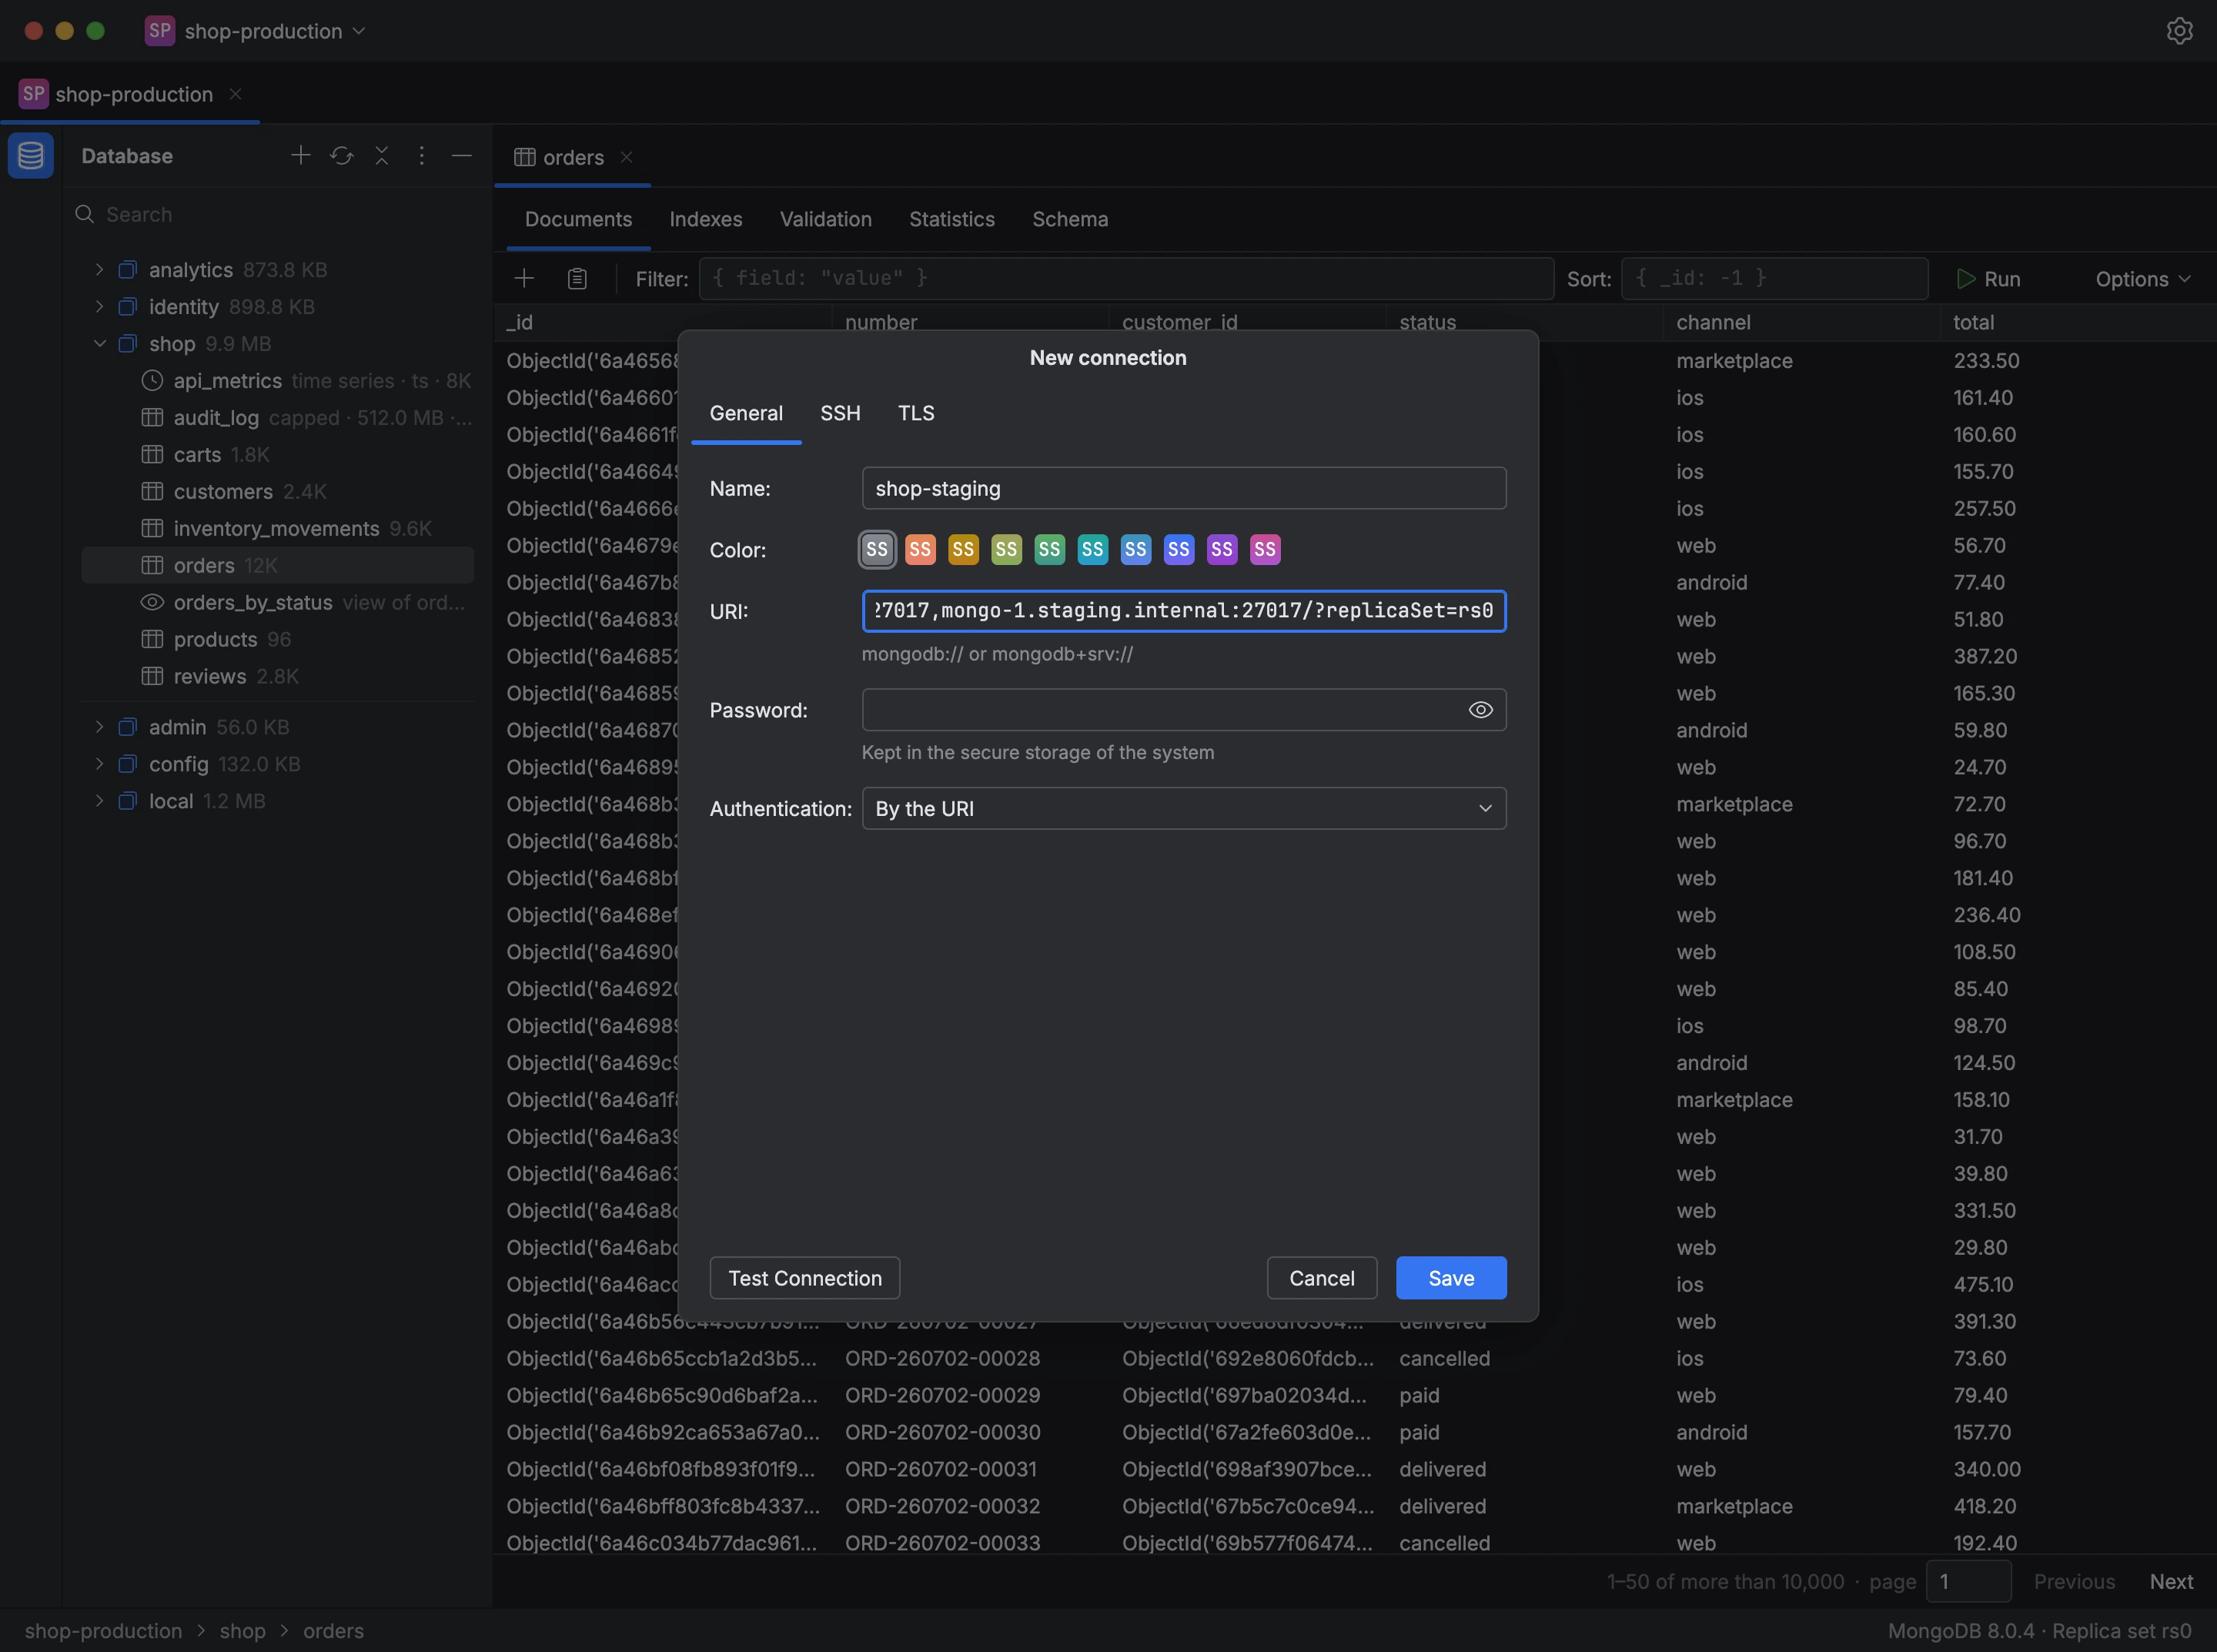
A connection identifies a MongoDB server by its URI, mongodb:// or mongodb+srv://, and stores everything needed to reach it. The connection dialog has three tabs:
- General: the name, the tab color, the URI, the password and the authentication.
- SSH: the tunnel the connection goes through, for a server that is only reachable from another machine.
- TLS: the certificate authority and the client certificate, when the server requires them.
The password is stored in the system's secure storage, never in the connections file. Authentication is either what the URI specifies or one of X.509, AWS IAM, OIDC and Kerberos, each with its own fields.
- Open the connection menu at the top of the window and choose New Connection….
- Enter a name and paste the server's URI.
- Enter the password, and choose the authentication if the URI doesn't specify one.
- Fill in the SSH or TLS tab if the server needs them.
- Click Test Connection to check that the server responds, then Save.